Complete each step in the request listed. Links to corresponding Knowledge Base articles are given.
This guide is just valid if the domain name is staying the same at the Destination. If the domain name is changing, allude to the Office 365 to Office 365 Migration Guide – While Changing the Domain Name.
The MSPComplete section includes the steps to convey the Device Management Agent (DMA) to users. This is an Agent which includes modules for HealthCheck for Office 365 and DeploymentPro. Deploying DMA to end users is a prerequisite if you will be using HealthCheck for Office 365 and/or DeploymentPro. The steps for HealthCheck for Office 365 have been omitted from this guide because your end users are already using Office 365.
DeploymentPro can be utilized to configure the Outlook mail profiles after the migration.
Note: DeploymentPro is included with the User Migration Bundle license. DeploymentPro cannot be purchased as a standalone service license, and it cannot be added to the single-use mailbox migration license. If you wish to remotely configure Outlook mail profiles using DeploymentPro after a migration, purchase the User Migration Bundle license.
MigrationWiz now supports the capability to share migration projects across a Workgroup. Migration projects are never again tied to individual accounts, they are tied to Workgroups. At the point when Workgroup Administrators turn on the Project Sharing feature, all Agents besides those who are Inactive are able to see all migrations projects. For more information, visit Project Sharing in MigrationWiz.
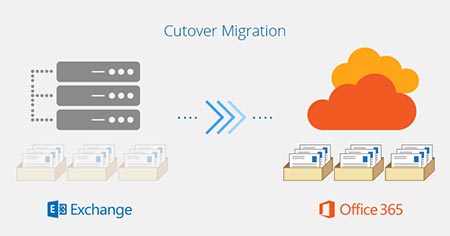
Office 365 to Office 365 migrations that are keeping the same domain name differ from the standard approach followed in other migration guides, because Microsoft just allows a domain to reside in one tenant at a time. For this reason, the following extra steps are included in this guide:
Adding a recipient mapping, under Advanced Options, to guarantee that all email retains the ability to be answered to, post-migration.
Removing the domain from the Source tenant.
Verifying the domain on the Destination tenant.
The users should first be added to MSPComplete using the vanity domain name. A MSPComplete subscription can then be added to each user. Be that as it may, before beginning the migration, the user addresses should be changed to utilize the .onmicrosoft.com domain names at both the Source and Destination, rather than the vanity domain names.
Notes:
There will be some email downtime with this migration because of the time required to remove the domain on the Source tenant and add it on the Destination tenant. This is because Microsoft just allows the same domain to exist on one Office 365 tenant at a time. Exchange Online Protection (EOP) can’t route email for the domain during the timeframe when the domain is removed from the Source tenant and added to the Destination tenant, assuming the MX record is pointed at EOP. This results in senders getting a non-conveyance report (NDR). Read the Move domains and settings from one EOP organization to another EOP organization TechNet article for options to line email during this time.
Utilization of RecipientMapping is always recommended but is mandatory if you delete the domain before you start your Delta migration pass.
Prepare the Source Environment
Create an administrator account in Office 365 to be utilized for migration, or utilize the global admin account for the tenant. Read the How would I create an administrator account in Office 365, and then utilize this during migration? article for more information.
Test mailbox access.
Note: Test access to the tenantname.onmicrosoft.com addresses, not to the domainname.com addresses. Make beyond any doubt that the tenantname.onmicrosoft.com account is attached to each mailbox in Office 365. As a matter of course, it should be attached, but if not, it will need to be added as an alias to each account. This can be done through the Office 365 admin portal or via PowerShell scripts. Read the How would I test mailbox access? article for more information.
Prepare the Destination Environment
Create an administrator account in Office 365 to be utilized for migration, or utilize the global admin account for the tenant. Read the How would I create an administrator account in Office 365, and then utilize this during migration? article for more information.
Set up accounts on Office 365 and assign licenses. These can be created in several ways:
Manually, one at a time. Read the Add users individually or in mass to Office 365 article from Microsoft for more information.
By mass import, via CSV file. Read the Add several users at the same time to Office 365 article from Microsoft for more information.
By PowerShell script. Read the Create user accounts with Office 365 PowerShell TechNet article for more information.
By DirSync, AAD Sync or AAD connect. Read the How would I synchronize my Azure Active Directory objects to Office 365? article for more information.
Using the BitTitan Sync Tool. Read the BitTitan Sync Program article for more information.
Test mailbox access.
Note: Test access to the tenantname.onmicrosoft.com addresses, not to the domainname.com addresses. Make beyond any doubt that the tenantname.onmicrosoft.com account is attached to each mailbox in Office 365. Naturally, it should be attached, but if not, it will need to be added as an alias to each account. This can be done through the Office 365 admin portal or via PowerShell scripts. Read the How would I test mailbox access? article for more information.
Prepare the tenant to send and receive large mail items. Read the How would I migrate large mail items to Office 365? article for more information.
MSPComplete Steps
Create the customer. Read the View, Add, and Edit Your Customers article for more information.
Create the Source and Destination endpoints. Read the View, Add, and Edit Customer Endpoints
article for more information.
For the Source endpoint:
Click Endpoints > Add Endpoint > Enter endpoint name > For endpoint type, select Office 365.
Click the Provide Credentials radio button, and enter the admin account credentials.
Notes:
This should be a global admin account. If creating a separate admin account for the motivation behind migration, allude to the Office 365 section in the How would I create an administrator account for login? article.
You should utilize the tenantname.onmicrosoft.com address, for the admin account domain name.
For the Destination endpoint:
Click Endpoints > Add Endpoint > Enter endpoint name > For endpoint type, select Office 365.
Click the Provide Credentials radio button, and enter the admin account credentials.
Notes:
This should be a global admin account. If you are creating a separate admin account for the motivation behind migration, allude to the Office 365 section in the How would I create an administrator account for login? article.
You should utilize the tenantname.onmicrosoft.com address for the admin account domain name.
Add users to your MSPComplete customer. From your MSPComplete customer dashboard, click Users > Add Users > Add Users Through an Endpoint (Recommended).
Apply a User Migration Bundle license to each user. From the Users tab, select all the users that you wish to subscribe, click the Apply User Migration Bundle License button, and confirm. Read the Apply User Migration Bundle licenses to the Customer’s Users article for more information.
Send DMA to users. Once DMA has been sent to users, check the Users tab in MSPComplete. This will be populated with the user accounts that have DMA installed. DMA can be sent by either of these options:
Via Group Policy Object (GPO).
Note: This is the recommended methodology because no closure user interaction is required. Read the How would I send the Device Management Agent with a Group Policy Object? article for more information.
Via email. Read the How would I send the Device Management Agent through email? article for more information.
DeploymentPro Steps
Launch DeploymentPro.
Go to All Products > Device Management, then click on DeploymentPro on the far left and pursue the prompts to launch.
Select a customer from the list by clicking on the customer name.
Note: The status column will show Enabled when a customer account has had DMA conveyed to users.
Configure customer DeploymentPro module:
Enter the Domain.
Select the Destination endpoint.
Checkmark the Auto-populate box.
In the Client Interface Configurations section, upload your company logo and add supporting text.
Note: We strongly recommend doing this, because this is the logo and text that end users will find in a desktop spring up when they are prompted to reconfigure their Outlook profiles. If you don’t upload your own logo, the default BitTitan logo will be included instead.
Save and continue.
Activate DeploymentPro module for users.
Either select all users (by putting a checkmark in the case to the left of the Primary Email column heading) or select the individual users (by putting a checkmark in the boxes to the left of the user email addresses).
Note: DeploymentPro is included with the User Migration Bundle license. DeploymentPro cannot be purchased as a standalone service license, and it cannot be added to the single-use mailbox migration license. If you wish to remotely configure Outlook mail profiles using DeploymentPro after a migration, purchase the User Migration Bundle license.
Click the Schedule Cutover button.
Schedule profile cutover date.
Set the date and time for the Outlook profile configuration to occur, and click the Schedule Cutover button.
Notes:
The DeploymentPro module will install on user devices immediately and then run silently until this date.
The profile cutover date should be set to a date and time that is shortly after MX record cutover.
On the profile cut-over date, users will be guided through the reconfiguration of their Outlook profile.